Thursday, August 9, 2012
Pizza Dough 1
I have tried a ton of different pizza dough recipes; trying to get that perfect crunch and chewiness. In the end, I found that the real secret was to use a pizza stone. I don't recommend buying a 'real' pizza stone though. Instead, go to your local home improvement store and buy a few granite tiles (if you live in the southwest, 1" thick UNGLAZED saltillo tiles work even better and are cheaper). You can get more surface area for much cheaper than what you would pay for a premium pizza stone. Here are the 2 different recipes that I use. You can get a better crisp (even without a pizza stone) with the first recipe, but it must be made 24 hours in advance.
Recipe 1
1 3/4 (.44 ounce) teaspoons salt
1 teaspoon (.11 ounce) instant yeast
1/4 cup (2 ounces) olive oil
1 3/4 cups (14 ounces) water, ice cold (40°F)
4 1/2 cups (20.25 ounces) unbleached flour (I use 1/2 bread flour and 1/2 all purpose flour), chilled
Semolina flour OR cornmeal for dusting
Add the first four ingredients to a chilled bowl and mix together. Add the flour and use dough hook on mixer to combine. Knead for 6 minutes on medium speed in mixer. If the dough works its way all the way up the hook, then add about 2 teaspoons of cold water. If the dough is sticking to the sides, add flour a pinch at a time until it holds to the hook and not the sides. Ideally, the dough should be mostly on the hook and just on the bottom of the bowl, it should not stick to the sides. If kneading by hand, just work the dough until is pretty stiff, usually about 10 min.
Line a cookie sheet with wax paper that has been lightly sprayed with cooking oil. Cut the dough into 4 equal pieces and generously flour them then transfer them to the cookie sheet. Generously coat the dough with cooking spray then cover with saran wrap and refrigerate for 24 hours.
Remove the pizzas from the refrigerator 2 hours before you are ready to bake them. Let them sit for 15 minutes, then knead them for about 2-3 minutes on a floured counter. Re-cover the dough with the saran and allow it to rest for the remaining hour and forty-five minutes.
Hand Toss Method
It takes some practice, but this is the only dough recipe that I have ever been able to hand toss. Flour your hands and the dough well. Press the dough into a round 6" disc with your fingers. When you pick up the dough, it should be soft, but shouldn't stretch out under it's own weight. First lay it over the backs of your partially closed hands. Gently give it a stretch and give it a little 'hop' turn. Repeat. As the dough gets bigger, your hands will be further and further apart.
Rolling Pin Method
Lightly flour the dough, work surface, and rolling pin. Start the dough by pressing it into a 6" disc with your fingers. Start in the center with the rolling pin and roll outwards with minimal pressure. Give the dough about 1/8 of a turn and repeat all the way around. If the dough pulls back to its original shape, allow it to rest for a few more minutes.
Finishing
To make the crust 'lip' just make the pizza a little bit bigger than you want the final product to be, then roll the edge in on itself.
I like to top this pizza crust rather minimally. Very little sauce, very fresh ingredients. I generally try to keep it to no more than 3 toppings (plus sauce and cheese).
Rub the outer crust with olive oil and add toppings. This can be baked on a cookie sheet at 350 degrees for about 30 min. or throw it on a 450 degree preheated pizza stone for about 10-15 min.
For a family of 5, I usually use 2 of the 4 balls of dough and I make 2 medium sized pizzas.
Sunday, April 22, 2012
Homemade Butta'
Why, hello readers! Mrs. Holgate here. Writing a blog about making one of my two favorite things: butter. Or, as my cooking idol Paula Dean says, buttah!
I had recently seen some friends making butter, and I thought, "what a cool way to take all the convenience out of food our grandparent's generation worked so hard for! I can be a pioneer woman!"
I immediately commenced pioneering by plugging in my Kitchen Aid. Okay... maybe I cheat a little. I found a really good You Tube video by a guy I have dubbed Super Helpful Dude, so I can't take credit for it entirely.
Everything's better with butta', Sug!
Ingredients:
2 C cream (try to get it as pure as possible - check the ingredients)
1/4 t salt
Directions
1. Start by chilling your bowl - I use a Kitchen Aid stand mixer because you have to beat it really fast and it would be a long time to hold egg beaters (And a REALLY long time to do it by hand), and it splashes, so it's nice to be able to drape a towel over it!
2. Prepare 1-2 C. ice water in a container that makes it easy to pour out the water, and not the ice. I used a travel coffee mug, and it worked great.
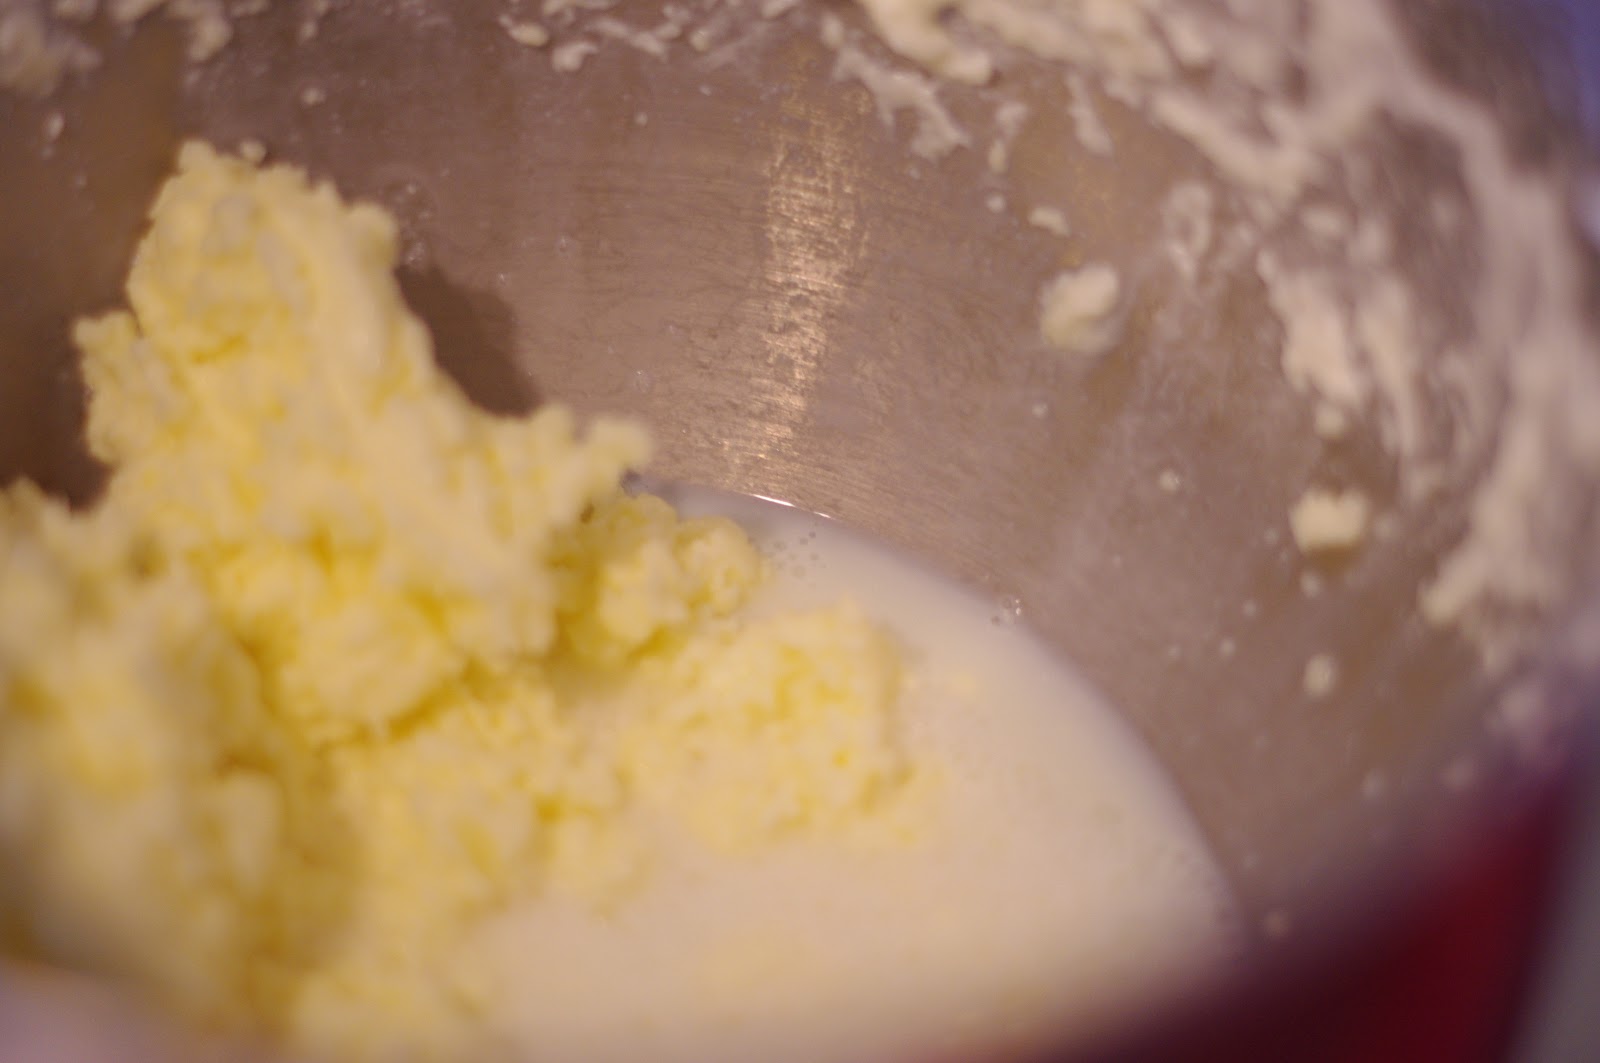
3. Pour cold cream into the bowl and turn the mixer on high using a balloon whisk. As you watch it mix, it will turn into something very familiar looking: whipped cream! I know it's super tempting to stop here and start topping, but don't! Mix until it separates into butter and buttermilk (so THAT'S where it comes from!), about 5-10 minutes (maybe less if you get pure cream).

4. Turn mixer off and use a rubber spatula to squish all the butter together and drain off the buttermilk (you can retain this to use in baking or cooking). I agree with Super Helpful Dude here, and switched to the paddle mixer. SUCH a good tip!
5. Pour some of the iced water (but not the ice) into the bowl with the butter, and return it to the mixer. Mix the butter and water for a minute (on a lower speed so it doesn't splash - and OH, does it splash!), squish the butter aside, and drain the water into the sink. Repeat this 2 or 3 times, until the water is draining relatively clear. Super Helpful Dude explains that this helps ensure all the buttermilk is out of the butter, making it last longer. I'm inclined to believe him since I technically have no idea what I'm doing.
6. Add the salt, if you want, and mix, this time without water. You can turn it back up higher to make sure it gets good and mixed in. I forgot to pay attention to how much butter and buttermilk the recipe yields. Sorry about that.

Ta-da! You're the proud new owner of smug, homemade butter. You can take pictures and show off on Facebook all you want! The best part: it really is better! It's super smooth, and even when it's relatively cold it cuts and spreads nicely. It melts better and the flavor is unbeatable!
And the second thing? Sugar! Although coconut is a close third. I know you've been wondering this whole time.
I had recently seen some friends making butter, and I thought, "what a cool way to take all the convenience out of food our grandparent's generation worked so hard for! I can be a pioneer woman!"
I immediately commenced pioneering by plugging in my Kitchen Aid. Okay... maybe I cheat a little. I found a really good You Tube video by a guy I have dubbed Super Helpful Dude, so I can't take credit for it entirely.
Everything's better with butta', Sug!
Ingredients:
2 C cream (try to get it as pure as possible - check the ingredients)
1/4 t salt
Directions
1. Start by chilling your bowl - I use a Kitchen Aid stand mixer because you have to beat it really fast and it would be a long time to hold egg beaters (And a REALLY long time to do it by hand), and it splashes, so it's nice to be able to drape a towel over it!
2. Prepare 1-2 C. ice water in a container that makes it easy to pour out the water, and not the ice. I used a travel coffee mug, and it worked great.
3. Pour cold cream into the bowl and turn the mixer on high using a balloon whisk. As you watch it mix, it will turn into something very familiar looking: whipped cream! I know it's super tempting to stop here and start topping, but don't! Mix until it separates into butter and buttermilk (so THAT'S where it comes from!), about 5-10 minutes (maybe less if you get pure cream).
4. Turn mixer off and use a rubber spatula to squish all the butter together and drain off the buttermilk (you can retain this to use in baking or cooking). I agree with Super Helpful Dude here, and switched to the paddle mixer. SUCH a good tip!
5. Pour some of the iced water (but not the ice) into the bowl with the butter, and return it to the mixer. Mix the butter and water for a minute (on a lower speed so it doesn't splash - and OH, does it splash!), squish the butter aside, and drain the water into the sink. Repeat this 2 or 3 times, until the water is draining relatively clear. Super Helpful Dude explains that this helps ensure all the buttermilk is out of the butter, making it last longer. I'm inclined to believe him since I technically have no idea what I'm doing.
6. Add the salt, if you want, and mix, this time without water. You can turn it back up higher to make sure it gets good and mixed in. I forgot to pay attention to how much butter and buttermilk the recipe yields. Sorry about that.

Ta-da! You're the proud new owner of smug, homemade butter. You can take pictures and show off on Facebook all you want! The best part: it really is better! It's super smooth, and even when it's relatively cold it cuts and spreads nicely. It melts better and the flavor is unbeatable!
And the second thing? Sugar! Although coconut is a close third. I know you've been wondering this whole time.
Monday, February 20, 2012
Perfect Pretty Pleasing Puffy PCookies

Ingredients
7 oz. shredded sweetened coconut
2 C. flour
½ tsp baking powder
½ tsp baking soda
½ tsp salt
¾ C. butter, melted
½ C. white sugar
1 C. packed brown sugar
1 T. vanilla extract
1 egg
1 egg yolk
2 C. chocolate chips
1 C. chopped walnuts or pecans
Preheat the oven to 325 degrees.
Evenly spread coconut across 1 cookie sheet and place in preheating oven. As coconut begins to brown, use wide spatula to to flip. Remove when golden brown and set aside. Next, roast chopped nuts on cookie sheet for approx 10-15 min.
In a small bowl, sift together flour, baking powder, baking soda and salt.
In a large mixing bowl, combine butter, brown sugar, and white sugar until well blended. Add vanilla, egg and egg yolk until creamy.
Mix in the sifted ingredients until just blended. add chocolate chips and chopped nuts by hand using a wooden spoon. When completely mixed, gently stir in toasted coconut.
Drop cookie dough ¼ C at a time onto the cookie sheets. Cookies should be about 3 in. apart.
Bake for 15-17 minutes, or until the edges are lightly toasted. The center may still have a wet/doughy look but will firm up when cool. Cool on baking sheets for 3-4 min before transferring to wire racks to cool completely.
Enjoy!

Thursday, February 16, 2012
Super Rice with Yummy Yellow Curry
It was the day before Valentine's in Seattle. It was cold and dark and bitter, and that was just last night's dinner. In a city that knows how to keep its secrets, one man is spilling his metaphorical guts. "Super rice."
.JPG)
Super Rice
Ingredients
4 Tbs olive oil (divided)
1 Lbs. ground turkey
2 oz. sun dried tomatoes
5 Cups cooked jasmine rice
1/2 Cup lemon juice
3 Eggs
2 Tbs Tarragon
2 Tbs onion powder
2 Tbs garlic powder
2 Tbs chili powder
1 Cup Water
Heat 2 Tbs. olive oil in skillet over medium/high, add ground turkey and cook until browned. Remove ground turkey. Reheat skillet with remaining olive oil. Add sun dried tomatoes and sear. Add cooked rice and sear, stirring continuously. Whip eggs then stir in until cooked. Add tarragon, onion powder, garlic powder, chili powder. Add water to deglaze bottom of pan. Mix in ground turkey and serve.

Yummy Yellow Curry
Ingredients
(For a healthy version, exclude sour cream and use an additional cup of buttermilk.)
2 Tbs olive oil
1 bay leaf
1/4 small onion diced
2 Tbs minced garlic
1 Cup sour cream
1 Cup Buttermilk
2 Tbs Coconut oil
1 teaspoon cinnamon
1 teaspoon smoked paprika
1/2 teaspoon cayenne pepper
4 Tbs lemon juice
Salt & pepper to taste
Heat olive oil and bay leaf over medium heat. Saute onion and garlic until onion is soft. Add remaining ingredients and turn heat down to low.Cover and simmer for 15 min.
Enjoy!
Tuesday, February 14, 2012
Perfect Braised Pork Loin

THE PREP
Pork Loin
1 tsp. Liquid Smoke
1 Cup Honey
1 clove garlic - crushed
3 bay leaves
1 Cup warm water
1/8 cup dried crushed red pepper
zest of 2 limes
Port (for braising)
Put all ingredients (excluding port) into ziploc bag. Make sure to dissolve honey (the warm water helps). Marinate pork loin overnight.
COOKING THE MEAT
Preheat oven to 375
Remove pork loin from marinade and use paper towel to remove crushed red pepper from pork loin. Pat dry and sprinkle with Kosher salt. Sear all sides of pork loin in olive oil. Add bay leaves to pan and sear them as well. put pork loin in casserole dish add 1 cup marinade and seared bay leaves. Add port until liquid comes no more than 1/3 of the way up the meat. cover with tinfoil and put in oven for 45 min. Baste every 15 to 20 min.
Enjoy!
Saturday, September 17, 2011
The Classic Standby: Steak and Potatoes and Butter and more Butter

THE PREP:
Preheat oven to 450°
30 minutes before cooking, remove your meat from the refrigerator
Using a kitchen fork or a meat tenderizing fork, puncture the meat 1/2" deep all over the surface
Sprinkle with meat tenderizer
Repeat on other side of meat
Let sit for 30 min.
Cut 4 new potatoes in half and then in quarters
Peel and chop 3 carrots
Cut 1 head of broccoli
Peel and 2 bulbs of garlic (about 20 cloves) (divided)
Crush garlic cloves with side of knife
add all veggies and half garlic to large bowl add 3 Tbs. olive oil + 2 Tbs dried Thyme
mix to coat
Spread all veggies on cookie sheet and put on top rack of oven. Cook 30 min or until Broccoli begins to brown
COOKING THE MEAT
Preheat your grill on high
Once preheated, sprinkle 1 tsp Kosher salt on both sides of meat
Add to grill
Sear for 3 minutes, turn 45° and place on unused portion of grill to sear another 2 minutes
Flip steak and repeat
While steak is searing, add 1 stick of butter to skillet + remaining cloves of garlic
Put over high heat and add 1 tbs olive oil
When steak is done searing, move directly to skillet and cover
Cook an additional 5-10 minutes depending on doneness desired
Remove meat and allow to rest for 10 minutes
Plate steak and veggies and serve!
I hope that you enjoy this recipe as much as I do!

Saturday, August 20, 2011
A Scone By Any Other Name...

-"A Scone."
"A what?"
-"It's a Scone. A delicious dry pastry, perfect for coffee."
"No. It can't be a Scone."
-"Why not?"
"Scone is such an ugly word. This tastes more like a... a... A SCRUDELCUP!"
-"I don't want to eat a scrudelcup. That sounds gross."
"How can it be gross? It's the best of the best. SCRUmptious & DELicious!"
-"What's the CUP for?"
"Your coffee."
Lemon Almond Scones with Cranberries
Ingredients:
2 cups all purpose flour
- 7 teaspoons white sugar
- 3 teaspoons raw sugar (optional)
- 1 tablespoon grated Lemon peel
- 2 teaspoons baking powder
- 1/2 teaspoon salt
- 1/4 teaspoon baking soda
- 1/2 cup cold butter
- 1 cup dried cranberries
- 1 cup sliced almonds
- 1/4 cup Lemon juice
- 1/4 cup half-and-half cream
- 1/4 cup honey
- 1 egg
GLAZE (optional):- 1/2 cup confectioners' sugar
- 1/4 cup honey
- 1 tablespoon orange juice
In a large bowl, combine the flour, 7 teaspoons sugar, lemon peel, baking powder, salt and baking soda. Cut in butter until the mixture resembles coarse crumbs; set aside. In a small bowl, combine the cranberries, lemon juice, cream, honey, almonds and egg. Add to flour mixture and stir until a soft dough forms.
On a floured surface, gently knead 6-8 times (for less dense, more fluffy scones, do not need). Pat dough into an 8-in. circle. Cut into 8 wedges. Separate wedges and place on an ungreased baking sheet. Brush with milk; sprinkle with raw sugar.
Bake at 400° for 12-15 minutes or until lightly browned. Remove to a wire rack.
Combine glaze ingredients if desired; drizzle over scones. Serve warm. Yield: 8 scones.
Subscribe to:
Posts (Atom)